Creating a Sender
In order to send emails using this service you must first create a sender address and an API key. The API key is generated when the sender address is created. A sender is effectively a mailbox within the system which emails are sent from.
To create a sender click the menu option ‘Senders’ and then ‘Add Sender’, or click the ‘Get Started’ button if you’ve just subscribed and are on the dashboard.
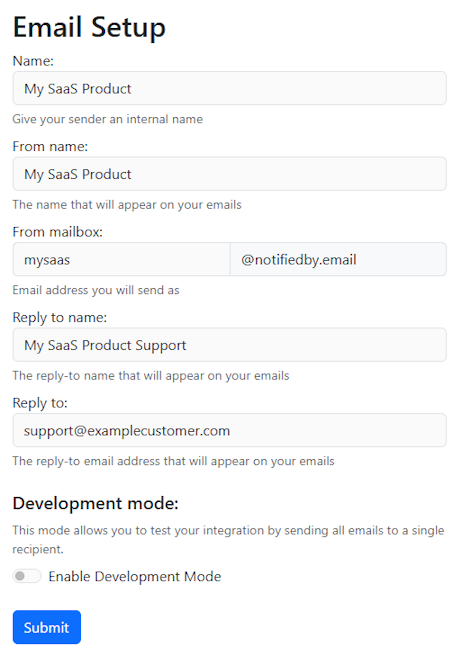
You’ll be presented with a page contains two sections. The first section is the setup for the mailbox and the second section is a preview based on what is entered in the mailbox setup. Below is an example of how this should be filled in, obviously with your own information.
And this would be the preview for the above information.
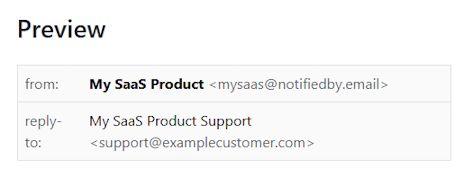
As you can see above, when you send an email using this sender is will be sent from the email address: mysaas@notifiedby.email with the friendly name: ‘My SaaS Product’
Note
Only the mailbox name (the bit before the @ sign) can be set using this system. That’s the point, we have setup the domain name notifiedby.email and configured all the necessary SPF, DKIM, DMARC settings so you don’t have to.
The reply to address in this case would be: support@examplecustomer.com but should be an email address you have access to.
Tip
If you need a shared inbox system you can receive emails and keep track of all responses why not try Emson shared inbox
Development Mode
When this is enabled you can enter an email address and all emails sent using the service will be sent to this address instead of the intended email address. This is useful when still developing you product.
All emails sent to the development mode email address are marked as such so you can tell when looking at sent emails later.